はじめに
WordPress導入して、サイト作りたい。 なんか自分が形にしたものを集約させたい。 そのためにはLAMP環境が必要なので、環境を用意します。
前提
以下サイトを確認したところ、WordPress導入するためには、以下条件クリアしなければならないらしい。
インストールの前に – サポートフォーラム – WordPress.org 日本語
以下引用
サーバー側の要件
PHP 7.3 以上
MySQL 5.6 以上または MariaDB 10.1 以上
これに気を付けつつ、下記記事を参考に環境作り行きます。
Ubuntu 22.04 LSTにLAMP環境を構築しました! | ある退職者のライフスタイル
環境
- VirtualBox
- Vagrant
- Ubuntu22.04
- Apache2.4
- PHP8.1
- MySQL8.0
- WordPress6.3.1
Apacheインストール
なんか入ってなさそうだったので、 下記コマンドでインストール
$sudo apt install apache2
インストール出来ているかの確認は「dpkg -l」でするらしい。
vagrant@vagrant:~$ dpkg -l | grep "apache2"
ii  apache2                               2.4.52-1ubuntu4.6                       amd64        A
pache HTTP Server
ii  apache2-bin                           2.4.52-1ubuntu4.6                       amd64        A
pache HTTP Server (modules and other binary files)
ii  apache2-data                          2.4.52-1ubuntu4.6                       all          A
pache HTTP Server (common files)
ii  apache2-utils                         2.4.52-1ubuntu4.6                       amd64        A
pache HTTP Server (utility programs for web servers)
なんかいそうなのでとりあえずOK。
ちゃんと動作確認もしようね。
ということでapache起動します。
vagrant@vagrant:~$ systemctl status apache2
● apache2.service - The Apache HTTP Server
     Loaded: loaded (/lib/systemd/system/apache2.service; enabled; vendor preset: enabled)
     Active: active (running) since Mon 2023-09-11 15:05:09 UTC; 8min ago
       Docs: https://httpd.apache.org/docs/2.4/
   Main PID: 2172 (apache2)
      Tasks: 55 (limit: 2233)
     Memory: 5.2M
        CPU: 101ms
     CGroup: /system.slice/apache2.service
             ├─2172 /usr/sbin/apache2 -k start
             ├─2173 /usr/sbin/apache2 -k start
             └─2174 /usr/sbin/apache2 -k start

Sep 11 15:05:09 vagrant systemd[1]: Starting The Apache HTTP Server...
Sep 11 15:05:09 vagrant apachectl[2171]: AH00558: apache2: Could not reliably determine the ser>
Sep 11 15:05:09 vagrant systemd[1]: Started The Apache HTTP Server.
と思ったけどもう起動してた~。
じゃあenableはどう?
vagrant@vagrant:~$ systemctl is-enabled apache2
enabled
既に enabled 済みだと……
いけいけ ubuntu 強い……
動作確認もしましょうね。
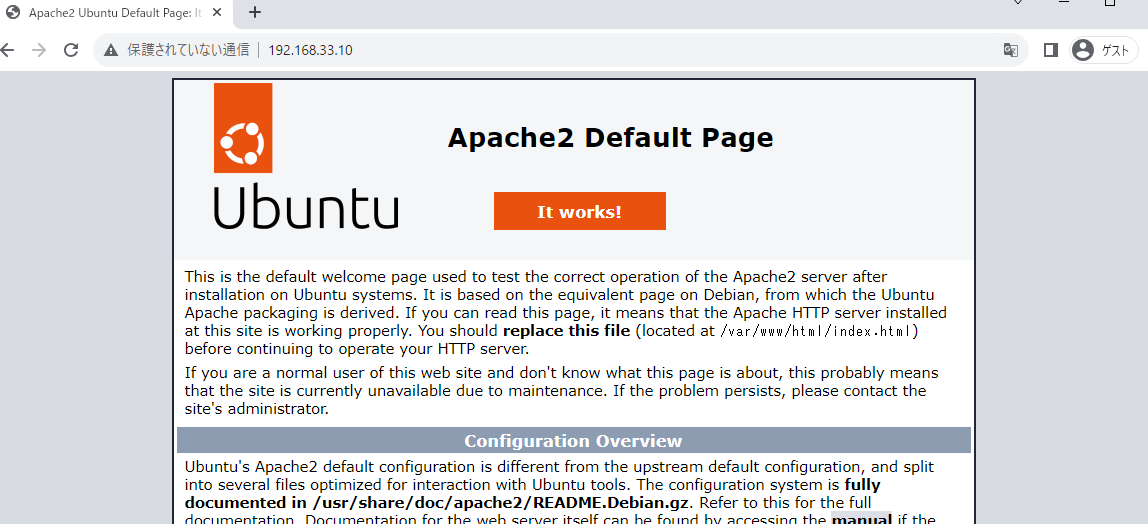
マシンのIPを直打ちして apache のページが見れることが確認できたね。
apache のバージョンはこれで確認できるらしい
vagrant@vagrant:~$ apache2ctl -v
Server version: Apache/2.4.52 (Ubuntu)
Server built:   2023-05-03T20:02:51
SSL対応
記事でSSL対応もしちゃってるので、僕もそうしようと思います。
SSLの設定が書かれているファイルを確認
vagrant@vagrant:~$ ls -al /etc/apache2/sites-available/
total 20
drwxr-xr-x 2 root root 4096 Sep 11 15:05 .
drwxr-xr-x 8 root root 4096 Sep 11 15:05 ..
-rw-r--r-- 1 root root 1332 May  3 20:02 000-default.conf
-rw-r--r-- 1 root root 6338 May  3 20:02 default-ssl.conf
default-ssl.conf が対象みたい。
ここの中身を見てみよう。
less /etc/apache2/sites-available/default-ssl.conf
コメントアウトされてない「SSLCertificate」はこの二行だね
SSLCertificateFile      /etc/ssl/certs/ssl-cert-snakeoil.pem
SSLCertificateKeyFile /etc/ssl/private/ssl-cert-snakeoil.key
なんかこれがSSL証明書っぽそう。
一応指定場所にファイルがあるか確認しておこう。
vagrant@vagrant:~$ ls -l /etc/ssl/certs/ssl-cert-snakeoil.pem
-rw-r--r-- 1 root root 1082 Sep 11 15:05 /etc/ssl/certs/ssl-cert-snakeoil.pem
vagrant@vagrant:~$ ls -l /etc/ssl/private/ssl-cert-snakeoil.key
ls: cannot access '/etc/ssl/private/ssl-cert-snakeoil.key': Permission denied
vagrant@vagrant:~$ sudo ls -l /etc/ssl/private/ssl-cert-snakeoil.key
-rw-r----- 1 root ssl-cert 1704 Sep 11 15:05 /etc/ssl/private/ssl-cert-snakeoil.key
鍵ファイルは sudo を付けて見にいこう。
(sudo付けないでコマンド叩いたら怒られた)
参考記事にはこう書いてあった。
Apache Webサーバーをインストールした段階でサンプルのSSL証明書が自動的に作成され、利用可能になっています。 サンプルの証明書の秘密鍵と公開鍵のファイル所在も、/etc/apache2/sites-available/default-ssl.confのファイルの中で指定されていて、変更する必要がありません。
そうなんだ。
証明書の存在が確認できたら、
次はApache側でSSLのモジュールとデフォルトのSSLを有効化していくみたい。
vagrant@vagrant:~$ sudo a2enmod ssl
Considering dependency setenvif for ssl:
Module setenvif already enabled
Considering dependency mime for ssl:
Module mime already enabled
Considering dependency socache_shmcb for ssl:
Enabling module socache_shmcb.
Enabling module ssl.
See /usr/share/doc/apache2/README.Debian.gz on how to configure SSL and create self-signed certi
ficates.
To activate the new configuration, you need to run:
  systemctl restart apache2
なんかいけたっぽい。
そんで、一番下の apache2 再起動をするみたい。
vagrant@vagrant:~$ sudo systemctl restart apache2
vagrant@vagrant:~$ sudo systemctl status apache2
● apache2.service - The Apache HTTP Server
     Loaded: loaded (/lib/systemd/system/apache2.service; enabled; vendor preset: enabled)
     Active: active (running) since Mon 2023-09-11 15:32:32 UTC; 6s ago
       Docs: https://httpd.apache.org/docs/2.4/
    Process: 2625 ExecStart=/usr/sbin/apachectl start (code=exited, status=0/SUCCESS)
   Main PID: 2629 (apache2)
      Tasks: 55 (limit: 2233)
     Memory: 6.1M
        CPU: 53ms
     CGroup: /system.slice/apache2.service
             ├─2629 /usr/sbin/apache2 -k start
             ├─2630 /usr/sbin/apache2 -k start
             └─2631 /usr/sbin/apache2 -k start

Sep 11 15:32:32 vagrant systemd[1]: Starting The Apache HTTP Server...
Sep 11 15:32:32 vagrant apachectl[2628]: AH00558: apache2: Could not reliably determine the server'>
Sep 11 15:32:32 vagrant systemd[1]: Started The Apache HTTP Server.
sudo 忘れがちになっちゃう……
みんなも気をつけて……
次はデフォルトSSLを有効化させるのかな。
vagrant@vagrant:~$ sudo a2ensite default-ssl
Enabling site default-ssl.
To activate the new configuration, you need to run:
  systemctl reload apache2
vagrant@vagrant:~$ sudo systemctl reload apache2
vagrant@vagrant:~$ sudo systemctl status apache2
● apache2.service - The Apache HTTP Server
     Loaded: loaded (/lib/systemd/system/apache2.service; enabled; vendor preset: enabled)
     Active: active (running) since Mon 2023-09-11 15:32:32 UTC; 2min 41s ago
なんかイケてそうなのでヨシ!
開いてるポートの確認
vagrant@vagrant:~$ nmap localhost
Starting Nmap 7.80 ( https://nmap.org ) at 2023-09-11 15:38 UTC
Nmap scan report for localhost (127.0.0.1)
Host is up (0.00018s latency).
Not shown: 997 closed ports
PORT    STATE SERVICE
22/tcp  open  ssh
80/tcp  open  http
443/tcp open  https
443 がいるのでヨシ!
web上はこんな感じ
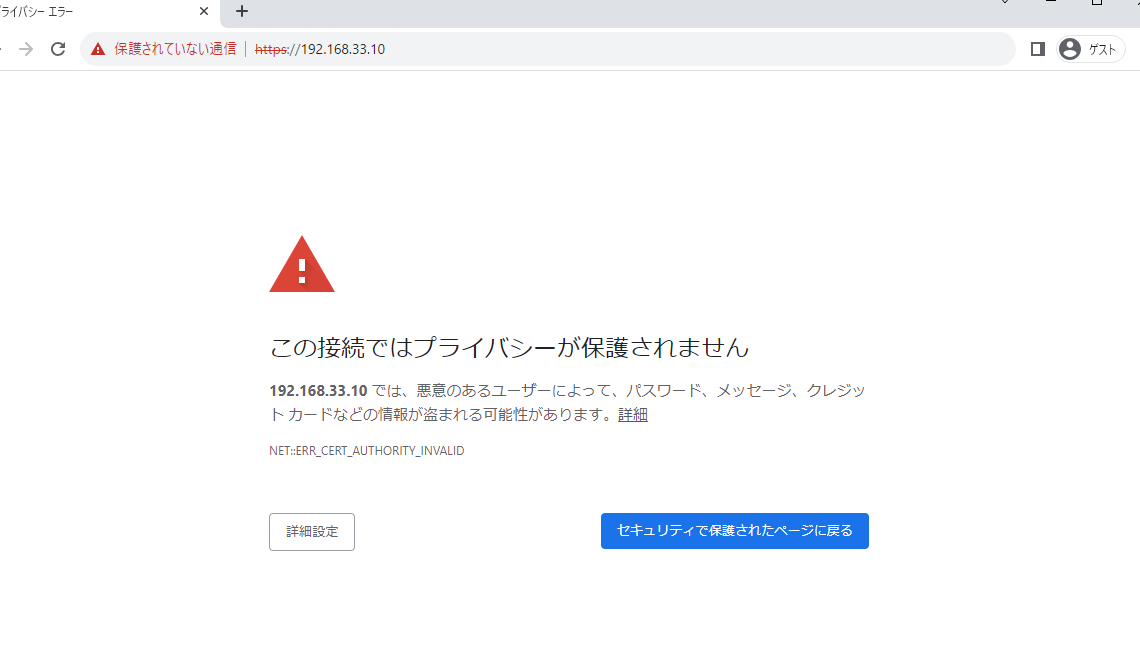
記事ではこれでOKと書いてあるので、OKとします。
Apache はこれでおしまい!
PHPインストール
which で調べたけど php 入ってなさそうなのでインストールします。
WordPressの要件である下記以上のものを入れる。
PHP 7.3 以上
普通にインストールしてみたら、PHP8.1 が入りそうなので、このまま行こうと思う。
叩くコマンドはこれ
$sudo apt install php php-mbstring php-pear libapache2-mod-php php-mysql php-fpm php-xmlrpc php-soap php-intl
一応、バージョン確認
vagrant@vagrant:~$ php -v
PHP 8.1.2-1ubuntu2.14 (cli) (built: Aug 18 2023 11:41:11) (NTS)
Copyright (c) The PHP Group
Zend Engine v4.1.2, Copyright (c) Zend Technologies
    with Zend OPcache v8.1.2-1ubuntu2.14, Copyright (c), by Zend Technologies
php.ini の設定
とりあえず、php.ini のバックアップを取る
vagrant@vagrant:~$ sudo cp /etc/php/8.1/apache2/php.ini /etc/php/8.1/apache2/php.ini.org
vagrant@vagrant:~$ sudo diff /etc/php/8.1/apache2/php.ini /etc/php/8.1/apache2/php.ini.org
vagrant@vagrant:~$ sudo ls -al /etc/php/8.1/apache2/
total 156
drwxr-xr-x 3 root root  4096 Sep 12 20:38 .
drwxr-xr-x 6 root root  4096 Sep 11 15:45 ..
drwxr-xr-x 2 root root  4096 Sep 11 15:45 conf.d
-rw-r--r-- 1 root root 72928 Aug 18 11:41 php.ini
-rw-r--r-- 1 root root 72928 Sep 12 20:38 php.ini.org
次にファイル編集
vagrant@vagrant:~$ sudo vi /etc/php/8.1/apache2/php.ini
vagrant@vagrant:~$ sudo diff /etc/php/8.1/apache2/php.ini /etc/php/8.1/apache2/php.ini.org
698c698
< post_max_size = 8192M
---
> post_max_size = 8M
850c850
< upload_max_filesize = 8192M
---
> upload_max_filesize = 2M
968c968
< date.timezone = "Asia/Tokyo"
---
> ;date.timezone =
1634c1634
< mbstring.language = Japanese
---
> ;mbstring.language = Japanese
1641c1641
< mbstring.internal_encoding = UTF-8
---
> ;mbstring.internal_encoding =
1649c1649
< mbstring.http_input = UTF-8
---
> ;mbstring.http_input =
1659c1659
< mbstring.http_output = pass
---
> ;mbstring.http_output =
1667c1667
< mbstring.encoding_translation = On
---
> ;mbstring.encoding_translation = Off
1672c1672
< mbstring.detect_order = auto
---
> ;mbstring.detect_order = auto
1677c1677
< mbstring.substitute_character = none
---
> ;mbstring.substitute_character = none
vagrant@vagrant:~$
fpm の www.conf の設定
まずバックアップを取る
vagrant@vagrant:~$ sudo cp /etc/php/8.1/fpm/pool.d/www.conf /etc/php/8.1/fpm/pool.d/www.conf.org
vagrant@vagrant:~$ sudo diff /etc/php/8.1/fpm/pool.d/www.conf /etc/php/8.1/fpm/pool.d/www.conf.org
vagrant@vagrant:~$ ls -al /etc/php/8.1/fpm/pool.d/
total 56
drwxr-xr-x 2 root root  4096 Sep 12 20:50 .
drwxr-xr-x 4 root root  4096 Sep 11 15:45 ..
-rw-r--r-- 1 root root 20876 Aug 18 11:41 www.conf
-rw-r--r-- 1 root root 20876 Sep 12 20:50 www.conf.org
次にファイル編集
vagrant@vagrant:~$ sudo vi /etc/php/8.1/fpm/pool.d/www.conf
vagrant@vagrant:~$ sudo diff /etc/php/8.1/fpm/pool.d/www.conf /etc/php/8.1/fpm/pool.d/www.conf.org
50c50
< listen.mode = 0660
---
> ;listen.mode = 0660
116c116
< pm.max_children = 25
---
> pm.max_children = 5
121c121
< pm.start_servers = 10
---
> pm.start_servers = 2
126c126
< pm.min_spare_servers = 10
---
> pm.min_spare_servers = 1
131c131
< pm.max_spare_servers = 20
---
> pm.max_spare_servers = 3
148c148
< pm.max_requests = 500
---
> ;pm.max_requests = 500
vagrant@vagrant:~$
PHP動作確認
/var/www/html/phpinfo.php を作成する。
vagrant@vagrant:~$ sudo vi /var/www/html/phpinfo.php
vagrant@vagrant:~$ sudo cat /var/www/html/phpinfo.php
<?php
phpinfo();
?>
vagrant@vagrant:~$
OS起動時にphp-fpmが起動するように設定されていることを確認
vagrant@vagrant:~$ systemctl list-unit-files --type=service | grep "php"
php8.1-fpm.service                         enabled         enabled
phpsessionclean.service                    static          -
vagrant@vagrant:~$
「enabled」になっているから良さそう
起動済みになっているが、一応再起動しておこう
vagrant@vagrant:~$ systemctl status php8.1-fpm
● php8.1-fpm.service - The PHP 8.1 FastCGI Process Manager
     Loaded: loaded (/lib/systemd/system/php8.1-fpm.service; enabled; vendor preset: enabled)
     Active: active (running) since Tue 2023-09-12 20:36:07 UTC; 24min ago
       Docs: man:php-fpm8.1(8)
   Main PID: 680 (php-fpm8.1)
     Status: "Processes active: 0, idle: 2, Requests: 0, slow: 0, Traffic: 0req/sec"
      Tasks: 3 (limit: 2233)
     Memory: 26.9M
        CPU: 641ms
     CGroup: /system.slice/php8.1-fpm.service
             ├─680 "php-fpm: master process (/etc/php/8.1/fpm/php-fpm.conf)" "" "" "" "" "" "" "" "" "" "" ">
             ├─816 "php-fpm: pool www" "" "" "" "" "" "" "" "" "" "" "" "" "" "" "" "" "" "" "" "" "" "" "" >
             └─817 "php-fpm: pool www" "" "" "" "" "" "" "" "" "" "" "" "" "" "" "" "" "" "" "" "" "" "" "" >

Sep 12 20:36:04 vagrant systemd[1]: Starting The PHP 8.1 FastCGI Process Manager...
Sep 12 20:36:07 vagrant systemd[1]: Started The PHP 8.1 FastCGI Process Manager.
vagrant@vagrant:~$ sudo systemctl restart php8.1-fpm
vagrant@vagrant:~$ systemctl status php8.1-fpm
● php8.1-fpm.service - The PHP 8.1 FastCGI Process Manager
     Loaded: loaded (/lib/systemd/system/php8.1-fpm.service; enabled; vendor preset: enabled)
     Active: active (running) since Tue 2023-09-12 21:01:08 UTC; 2s ago
       Docs: man:php-fpm8.1(8)
    Process: 1877 ExecStartPost=/usr/lib/php/php-fpm-socket-helper install /run/php/php-fpm.sock /etc/php/8.>
   Main PID: 1863 (php-fpm8.1)
     Status: "Ready to handle connections"
      Tasks: 11 (limit: 2233)
     Memory: 13.2M
        CPU: 178ms
     CGroup: /system.slice/php8.1-fpm.service
             ├─1863 "php-fpm: master process (/etc/php/8.1/fpm/php-fpm.conf)" "" "" "" "" "" "" "" "" "" "" >
             ├─1867 "php-fpm: pool www" "" "" "" "" "" "" "" "" "" "" "" "" "" "" "" "" "" "" "" "" "" "" "">
             ├─1868 "php-fpm: pool www" "" "" "" "" "" "" "" "" "" "" "" "" "" "" "" "" "" "" "" "" "" "" "">
             ├─1869 "php-fpm: pool www" "" "" "" "" "" "" "" "" "" "" "" "" "" "" "" "" "" "" "" "" "" "" "">
             ├─1870 "php-fpm: pool www" "" "" "" "" "" "" "" "" "" "" "" "" "" "" "" "" "" "" "" "" "" "" "">
             ├─1871 "php-fpm: pool www" "" "" "" "" "" "" "" "" "" "" "" "" "" "" "" "" "" "" "" "" "" "" "">
             ├─1872 "php-fpm: pool www" "" "" "" "" "" "" "" "" "" "" "" "" "" "" "" "" "" "" "" "" "" "" "">
             ├─1873 "php-fpm: pool www" "" "" "" "" "" "" "" "" "" "" "" "" "" "" "" "" "" "" "" "" "" "" "">
             ├─1874 "php-fpm: pool www" "" "" "" "" "" "" "" "" "" "" "" "" "" "" "" "" "" "" "" "" "" "" "">
             ├─1875 "php-fpm: pool www" "" "" "" "" "" "" "" "" "" "" "" "" "" "" "" "" "" "" "" "" "" "" "">
             └─1876 "php-fpm: pool www" "" "" "" "" "" "" "" "" "" "" "" "" "" "" "" "" "" "" "" "" "" "" "">

Sep 12 21:01:08 vagrant systemd[1]: Starting The PHP 8.1 FastCGI Process Manager...
Sep 12 21:01:08 vagrant systemd[1]: Started The PHP 8.1 FastCGI Process Manager.
Apache も再起動しておこう
vagrant@vagrant:~$ sudo systemctl status apache2
● apache2.service - The Apache HTTP Server
     Loaded: loaded (/lib/systemd/system/apache2.service; enabled; vendor preset: enabled)
     Active: active (running) since Tue 2023-09-12 20:36:06 UTC; 26min ago
       Docs: https://httpd.apache.org/docs/2.4/
   Main PID: 798 (apache2)
      Tasks: 6 (limit: 2233)
     Memory: 20.8M
        CPU: 652ms
     CGroup: /system.slice/apache2.service
             ├─798 /usr/sbin/apache2 -k start
             ├─823 /usr/sbin/apache2 -k start
             ├─824 /usr/sbin/apache2 -k start
             ├─825 /usr/sbin/apache2 -k start
             ├─826 /usr/sbin/apache2 -k start
             └─827 /usr/sbin/apache2 -k start

Sep 12 20:36:04 vagrant systemd[1]: Starting The Apache HTTP Server...
Sep 12 20:36:06 vagrant apachectl[757]: AH00558: apache2: Could not reliably determine the server's fully qu>
Sep 12 20:36:06 vagrant systemd[1]: Started The Apache HTTP Server.
vagrant@vagrant:~$ sudo systemctl restart apache2
vagrant@vagrant:~$ sudo systemctl status apache2
● apache2.service - The Apache HTTP Server
     Loaded: loaded (/lib/systemd/system/apache2.service; enabled; vendor preset: enabled)
     Active: active (running) since Tue 2023-09-12 21:02:55 UTC; 1s ago
       Docs: https://httpd.apache.org/docs/2.4/
    Process: 1901 ExecStart=/usr/sbin/apachectl start (code=exited, status=0/SUCCESS)
   Main PID: 1905 (apache2)
      Tasks: 6 (limit: 2233)
     Memory: 13.1M
        CPU: 181ms
     CGroup: /system.slice/apache2.service
             ├─1905 /usr/sbin/apache2 -k start
             ├─1906 /usr/sbin/apache2 -k start
             ├─1907 /usr/sbin/apache2 -k start
             ├─1908 /usr/sbin/apache2 -k start
             ├─1909 /usr/sbin/apache2 -k start
             └─1910 /usr/sbin/apache2 -k start

Sep 12 21:02:55 vagrant systemd[1]: Starting The Apache HTTP Server...
Sep 12 21:02:55 vagrant apachectl[1904]: AH00558: apache2: Could not reliably determine the server's fully q>
Sep 12 21:02:55 vagrant systemd[1]: Started The Apache HTTP Server.
ブラウザから下記のような表示が見えたらOK
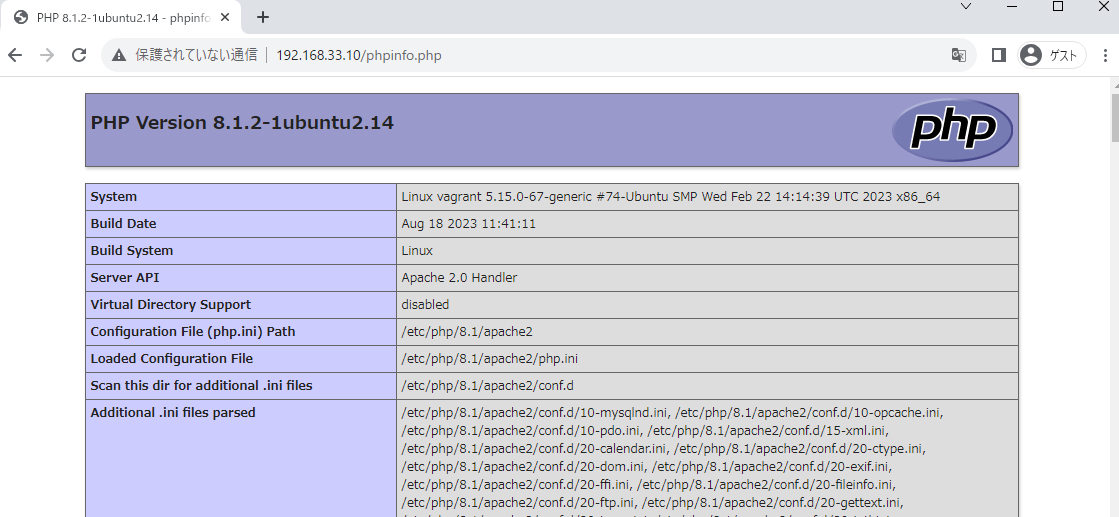
phpinfo.php は消しておこう
vagrant@vagrant:~$ cd /var/www/html/
vagrant@vagrant:/var/www/html$ sudo rm phpinfo.php
vagrant@vagrant:/var/www/html$ ls -l
total 12
-rw-r--r-- 1 root root 10671 Sep 11 15:05 index.html
MySQLのインストール
一応、MySQLが入ってないことを確認
vagrant@vagrant:~$ sudo dpkg -l | grep mysql
ii  php-mysql                             2:8.1+92ubuntu1                              all          MySQL modu
le for PHP [default]
ii  php8.1-mysql                          8.1.2-1ubuntu2.14                            amd64        MySQL modu
le for PHP
mysql-server とかいないね。
というわけでインストールしよう。
これを満たすものになるように。
vagrant@vagrant:~$ sudo apt install mysql-client mysql-server
Reading package lists... Done
Building dependency tree... Done
Reading state information... Done
The following additional packages will be installed:
  libcgi-fast-perl libcgi-pm-perl libevent-pthreads-2.1-7 libfcgi-bin libfcgi-perl libfcgi0ldbl
  libhtml-template-perl libmecab2 libprotobuf-lite23 mecab-ipadic mecab-ipadic-utf8 mecab-utils
  mysql-client-8.0 mysql-client-core-8.0 mysql-common mysql-server-8.0 mysql-server-core-8.0
Suggested packages:
  libipc-sharedcache-perl mailx tinyca
The following NEW packages will be installed:
  libcgi-fast-perl libcgi-pm-perl libevent-pthreads-2.1-7 libfcgi-bin libfcgi-perl libfcgi0ldbl
  libhtml-template-perl libmecab2 libprotobuf-lite23 mecab-ipadic mecab-ipadic-utf8 mecab-utils mysql-client
  mysql-client-8.0 mysql-client-core-8.0 mysql-common mysql-server mysql-server-8.0 mysql-server-core-8.0
0 upgraded, 19 newly installed, 0 to remove and 116 not upgraded.
Need to get 29.2 MB of archives.
After this operation, 242 MB of additional disk space will be used.
Do you want to continue? [Y/n]
mysql-client-8.0 とか書いてそうだからいけそう。
このまま yes でインストールしちゃいましょ。
インストール完了したら確認
vagrant@vagrant:~$ sudo dpkg -l | grep mysql
ii  mysql-client                          8.0.34-0ubuntu0.22.04.1                      all          MySQL data
base client (metapackage depending on the latest version)
ii  mysql-client-8.0                      8.0.34-0ubuntu0.22.04.1                      amd64        MySQL data
base client binaries
ii  mysql-client-core-8.0                 8.0.34-0ubuntu0.22.04.1                      amd64        MySQL data
base core client binaries
ii  mysql-common                          5.8+1.0.8                                    all          MySQL data
base common files, e.g. /etc/mysql/my.cnf
ii  mysql-server                          8.0.34-0ubuntu0.22.04.1                      all          MySQL data
base server (metapackage depending on the latest version)
ii  mysql-server-8.0                      8.0.34-0ubuntu0.22.04.1                      amd64        MySQL data
base server binaries and system database setup
ii  mysql-server-core-8.0                 8.0.34-0ubuntu0.22.04.1                      amd64        MySQL data
base server binaries
ii  php-mysql                             2:8.1+92ubuntu1                              all          MySQL modu
le for PHP [default]
ii  php8.1-mysql                          8.1.2-1ubuntu2.14                            amd64        MySQL modu
le for PHP
vagrant@vagrant:~$
mysql が入ったことは分かったからOK!
mysql が起動しているか確認
vagrant@vagrant:~$ systemctl status mysql
● mysql.service - MySQL Community Server
     Loaded: loaded (/lib/systemd/system/mysql.service; enabled; vendor preset: enabled)
     Active: active (running) since Thu 2023-09-14 08:11:42 UTC; 3min 36s ago
    Process: 2631 ExecStartPre=/usr/share/mysql/mysql-systemd-start pre (code=exited, status=0/SUCCESS)
   Main PID: 2639 (mysqld)
     Status: "Server is operational"
      Tasks: 37 (limit: 2233)
     Memory: 365.2M
        CPU: 7.217s
     CGroup: /system.slice/mysql.service
             └─2639 /usr/sbin/mysqld

Sep 14 08:11:39 vagrant systemd[1]: Starting MySQL Community Server...
Sep 14 08:11:42 vagrant systemd[1]: Started MySQL Community Server.
起動しているだと……!?
優秀ですね。
enable 設定も確認しとこっか
vagrant@vagrant:~$ systemctl is-enabled mysql
enabled
enable にもなってる……
じゃああとは mysql の設定ですね。
my.conf 設定
上記記事も参考にします。
では、my.conf を作ります。
$sudo vim /etc/my.conf
ファイル内に以下をぶっこみます。
vagrant@vagrant:~$ sudo cat /etc/my.conf
aracter_set_server = utf8mb4 # 文字コード
collation_server = utf8mb4_ja_0900_as_cs # 照合順序

# timezone
default-time-zone = SYSTEM
log_timestamps = SYSTEM

# Error Log
log-error = /var/log/mysql/mysql-error.log

# Slow Query Log
slow_query_log = 1
slow_query_log_file = /var/log/mysql/mysql-slow.log
long_query_time = 5.0
log_queries_not_using_indexes = 0

# General Log
general_log = 1
general_log_file = /var/log/mysql/mysql-query.log

[mysql]
default-character-set = utf8mb4

[client]
default-character-set = utf8mb4
一応ログあたりが現状ないことを確認。
vagrant@vagrant:~$ sudo ls -l /var/log/mysql/mysql-error.log
ls: cannot access '/var/log/mysql/mysql-error.log': No such file or directory
vagrant@vagrant:~$ sudo ls -l /var/log/mysql/mysql-slow.log
ls: cannot access '/var/log/mysql/mysql-slow.log': No such file or directory
vagrant@vagrant:~$ sudo ls -l /var/log/mysql/mysql-query.log
ls: cannot access '/var/log/mysql/mysql-query.log': No such file or directory
vagrant@vagrant:~$ sudo ls -l /var/log/mysql/
total 8
-rw-r----- 1 mysql adm 4288 Sep 14 08:11 error.log
よし、再起動しましょう。
vagrant@vagrant:~$ sudo systemctl restart mysql
vagrant@vagrant:~$ sudo systemctl status mysql
● mysql.service - MySQL Community Server
     Loaded: loaded (/lib/systemd/system/mysql.service; enabled; vendor preset: enabled)
     Active: active (running) since Thu 2023-09-14 08:25:26 UTC; 5s ago
    Process: 2885 ExecStartPre=/usr/share/mysql/mysql-systemd-start pre (code=exited, status=0/SUCCESS)
   Main PID: 2894 (mysqld)
     Status: "Server is operational"
      Tasks: 38 (limit: 2233)
     Memory: 365.1M
        CPU: 1.805s
     CGroup: /system.slice/mysql.service
             └─2894 /usr/sbin/mysqld

Sep 14 08:25:24 vagrant systemd[1]: Starting MySQL Community Server...
Sep 14 08:25:26 vagrant systemd[1]: Started MySQL Community Server.
MySQL 初期設定
初期設定前にパスワードがどうなってるか確認しとこう。
vagrant@vagrant:~$ sudo less /var/log/mysql/error.log  | grep "pass"
2023-09-14T08:11:11.352119Z 6 [Warning] [MY-010453] [Server] root@localhost is created with an empty password
! Please consider switching off the --initialize-insecure option.
直訳すると「空のパスワードで設定したよ!」らしい。
以上を踏まえていってみよう。
vagrant@vagrant:~$ sudo mysql_secure_installation

Securing the MySQL server deployment.

Connecting to MySQL using a blank password.

VALIDATE PASSWORD COMPONENT can be used to test passwords
and improve security. It checks the strength of password
and allows the users to set only those passwords which are
secure enough. Would you like to setup VALIDATE PASSWORD component?

Press y|Y for Yes, any other key for No: [Enter]

Skipping password set for root as authentication with auth_socket is used by default.
If you would like to use password authentication instead, this can be done with the "ALTER_USER" command.
See https://dev.mysql.com/doc/refman/8.0/en/alter-user.html#alter-user-password-management for more informatio
n.

By default, a MySQL installation has an anonymous user,
allowing anyone to log into MySQL without having to have
a user account created for them. This is intended only for
testing, and to make the installation go a bit smoother.
You should remove them before moving into a production
environment.

Remove anonymous users? (Press y|Y for Yes, any other key for No) :  y
Success.


Normally, root should only be allowed to connect from
'localhost'. This ensures that someone cannot guess at
the root password from the network.

Disallow root login remotely? (Press y|Y for Yes, any other key for No) : y
Success.

By default, MySQL comes with a database named 'test' that
anyone can access. This is also intended only for testing,
and should be removed before moving into a production
environment.


Remove test database and access to it? (Press y|Y for Yes, any other key for No) : y
 - Dropping test database...
Success.

 - Removing privileges on test database...
Success.

Reloading the privilege tables will ensure that all changes
made so far will take effect immediately.

Reload privilege tables now? (Press y|Y for Yes, any other key for No) : y
Success.

All done!
あ、パスワード設定スルーしてしまった
vagrant@vagrant:~$ sudo mysql -u root -p
Enter password:
Welcome to the MySQL monitor.  Commands end with ; or \g.
Your MySQL connection id is 10
Server version: 8.0.34-0ubuntu0.22.04.1 (Ubuntu)

Copyright (c) 2000, 2023, Oracle and/or its affiliates.

Oracle is a registered trademark of Oracle Corporation and/or its
affiliates. Other names may be trademarks of their respective
owners.

Type 'help;' or '\h' for help. Type '\c' to clear the current input statement.

mysql>
空パスワードで入れちゃった……
でも安心してください。
mysql 内でパスワード変更できます。
mysql> USE mysql;
Reading table information for completion of table and column names
You can turn off this feature to get a quicker startup with -A

Database changed
mysql> ALTER USER 'root'@'localhost' IDENTIFIED BY 'secret';
Query OK, 0 rows affected (0.00 sec)
今回は新パスワード「secret」にしました。
一回mysql から抜けて新パスワードでログインできるか確認してみます。
vagrant@vagrant:~$ sudo mysql -u root -p
Enter password:
Welcome to the MySQL monitor.  Commands end with ; or \g.
Your MySQL connection id is 11
Server version: 8.0.34-0ubuntu0.22.04.1 (Ubuntu)

Copyright (c) 2000, 2023, Oracle and/or its affiliates.

Oracle is a registered trademark of Oracle Corporation and/or its
affiliates. Other names may be trademarks of their respective
owners.

Type 'help;' or '\h' for help. Type '\c' to clear the current input statement.

mysql>
新パスワードでログインできることを確認したよ。
でもパスワードいちいち入力面倒だなあ。
MySQLのコマンドラインで-pオプションを使わずにパスワードを指定する方法 - インフラエンジニアway - Powered by HEARTBEATS
上記記事を参考に .my.conf を作成しよう
sudo vim /root/.my.conf
以下内容をぶっこむ
vagrant@vagrant:~$ sudo cat /root/.my.conf
[client]
password="secret"
ログインしてみよう
vagrant@vagrant:~$ sudo mysql -u root
Welcome to the MySQL monitor.  Commands end with ; or \g.
Your MySQL connection id is 12
Server version: 8.0.34-0ubuntu0.22.04.1 (Ubuntu)

Copyright (c) 2000, 2023, Oracle and/or its affiliates.

Oracle is a registered trademark of Oracle Corporation and/or its
affiliates. Other names may be trademarks of their respective
owners.

Type 'help;' or '\h' for help. Type '\c' to clear the current input statement.

mysql>
-p つけずに入れた!
これで複雑なパスワードにしても安心してログインできるね。
MySQLサーバーの確認
現在の状態確認
mysql> status
--------------
mysql  Ver 8.0.34-0ubuntu0.22.04.1 for Linux on x86_64 ((Ubuntu))

Connection id:          14
Current database:
Current user:           root@localhost
SSL:                    Not in use
Current pager:          stdout
Using outfile:          ''
Using delimiter:        ;
Server version:         8.0.34-0ubuntu0.22.04.1 (Ubuntu)
Protocol version:       10
Connection:             Localhost via UNIX socket
Server characterset:    utf8mb4
Db     characterset:    utf8mb4
Client characterset:    utf8mb4
Conn.  characterset:    utf8mb4
UNIX socket:            /var/run/mysqld/mysqld.sock
Binary data as:         Hexadecimal
Uptime:                 42 min 56 sec

Threads: 2  Questions: 152  Slow queries: 0  Opens: 277  Flush tables: 3  Open tables: 196  Queries per second
 avg: 0.059
--------------
MySQLサーバーに登録されているユーザー一覧のユーザー名とホスト名の確認。
mysql> select user, host from mysql.user
    -> ;
+------------------+-----------+
| user             | host      |
+------------------+-----------+
| debian-sys-maint | localhost |
| mysql.infoschema | localhost |
| mysql.session    | localhost |
| mysql.sys        | localhost |
| root             | localhost |
+------------------+-----------+
5 rows in set (0.00 sec)
セミコロン入れるの忘れちゃった。
気を付けよう。
データーベース一覧の確認。
mysql> show databases;
+--------------------+
| Database           |
+--------------------+
| information_schema |
| mysql              |
| performance_schema |
| sys                |
+--------------------+
4 rows in set (0.00 sec)
うん、まあこんなもんでいいでしょう。
WordPress インストール
やっとたどりついた……
Ubuntu 22.04 LTS に WordPress 6.2 をインストール - Qiita
上記記事を参考にする。
まず、ドキュメントルートに移動。
vagrant@vagrant:~$ cd /var/www/html
vagrant@vagrant:/var/www/html$ pwd
/var/www/html
最新版WordPressをダウンロードする
vagrant@vagrant:/var/www/html$ sudo wget https://ja.wordpress.org/latest-ja.tar.gz
--2023-09-14 18:19:38--  https://ja.wordpress.org/latest-ja.tar.gz
Resolving ja.wordpress.org (ja.wordpress.org)... 198.143.164.253
Connecting to ja.wordpress.org (ja.wordpress.org)|198.143.164.253|:443... connected.
HTTP request sent, awaiting response... 200 OK
Length: 24293525 (23M) [application/octet-stream]
Saving to: ‘latest-ja.tar.gz’

latest-ja.tar.gz            100%[=========================================>]  23.17M  1.55MB/s    in 26s

2023-09-14 18:20:05 (922 KB/s) - ‘latest-ja.tar.gz’ saved [24293525/24293525]

vagrant@vagrant:/var/www/html$ ls -l
total 23740
-rw-r--r-- 1 root root    10671 Sep 12 00:05 index.html
-rw-r--r-- 1 root root 24293525 Sep  4 14:00 latest-ja.tar.gz
解凍しよう。
vagrant@vagrant:/var/www/html$ sudo tar xvf latest-ja.tar.gz
WordPress用データベース作成
mysql> CREATE DATABASE wordpress DEFAULT CHARACTER SET utf8;
Query OK, 1 row affected, 1 warning (0.01 sec)

mysql> show DATABASES;
+--------------------+
| Database           |
+--------------------+
| information_schema |
| mysql              |
| performance_schema |
| sys                |
| wordpress          |
+--------------------+
5 rows in set (0.00 sec)
ユーザーも作ろう
mysql> use wordpress;
Database changed

mysql> CREATE USER 'wordpress'@'localhost' IDENTIFIED BY '[password]';
Query OK, 0 rows affected (0.03 sec)

mysql> SELECT user,host FROM mysql.user;
+------------------+-----------+
| user             | host      |
+------------------+-----------+
| debian-sys-maint | localhost |
| mysql.infoschema | localhost |
| mysql.session    | localhost |
| mysql.sys        | localhost |
| root             | localhost |
| wordpress        | localhost |
+------------------+-----------+
6 rows in set (0.00 sec)

mysql> GRANT ALL ON wordpress.* TO 'wordpress'@'localhost' WITH GRANT OPTION;
Query OK, 0 rows affected (0.00 sec)

mysql> FLUSH PRIVILEGES;
Query OK, 0 rows affected (0.01 sec)
FLUSH PRIVILEGES; ってなんぞやと思い調べた。
MySQLのFLUSH PRIVILEGESが必要なケース | my opinion is my own
とりあえずキャッシュをリフレッシュするやつって感じ? 削除系のクエリ(でいいの?)を実行したときは必ず必要見たい。
CUIはおしまい。
WordPress初期設定
上記アクセスすると、こんな画面が出てくる
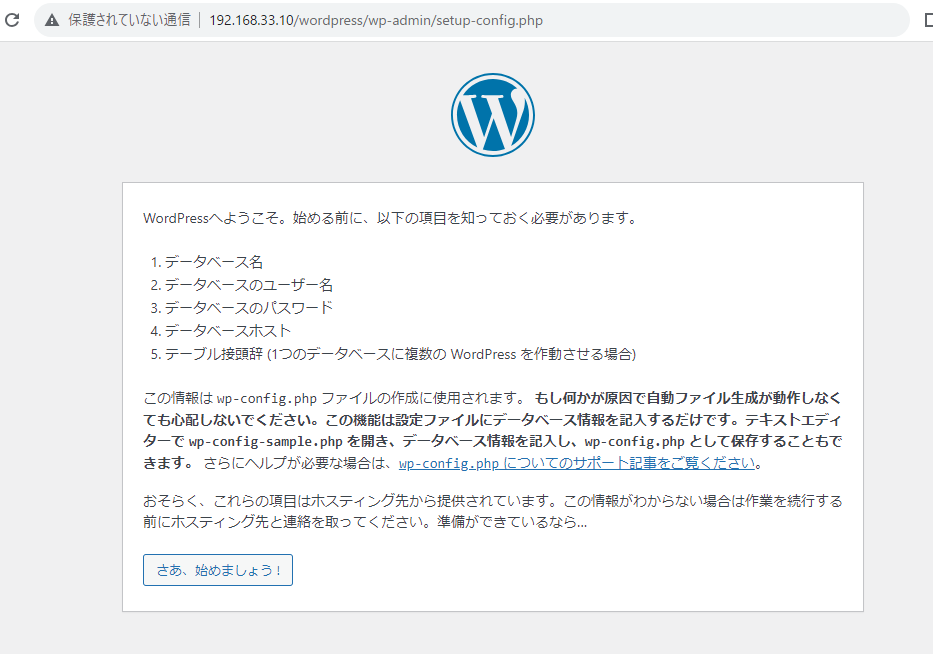
始めるボタン押す。
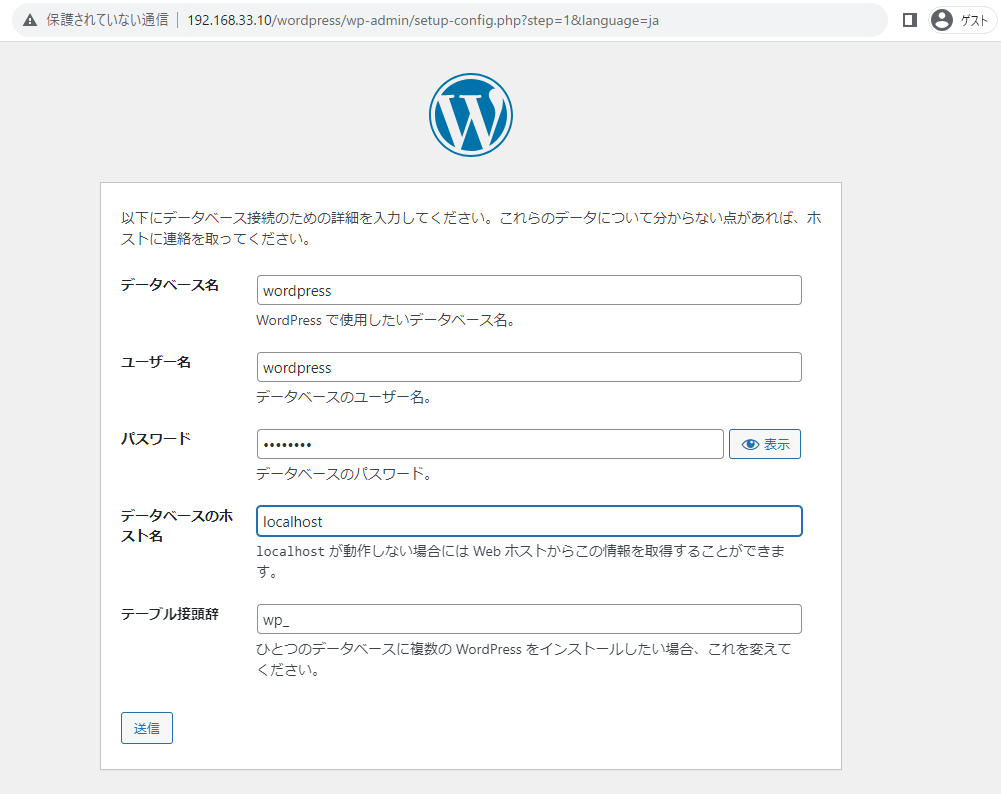
データベースに設定した通りに記入
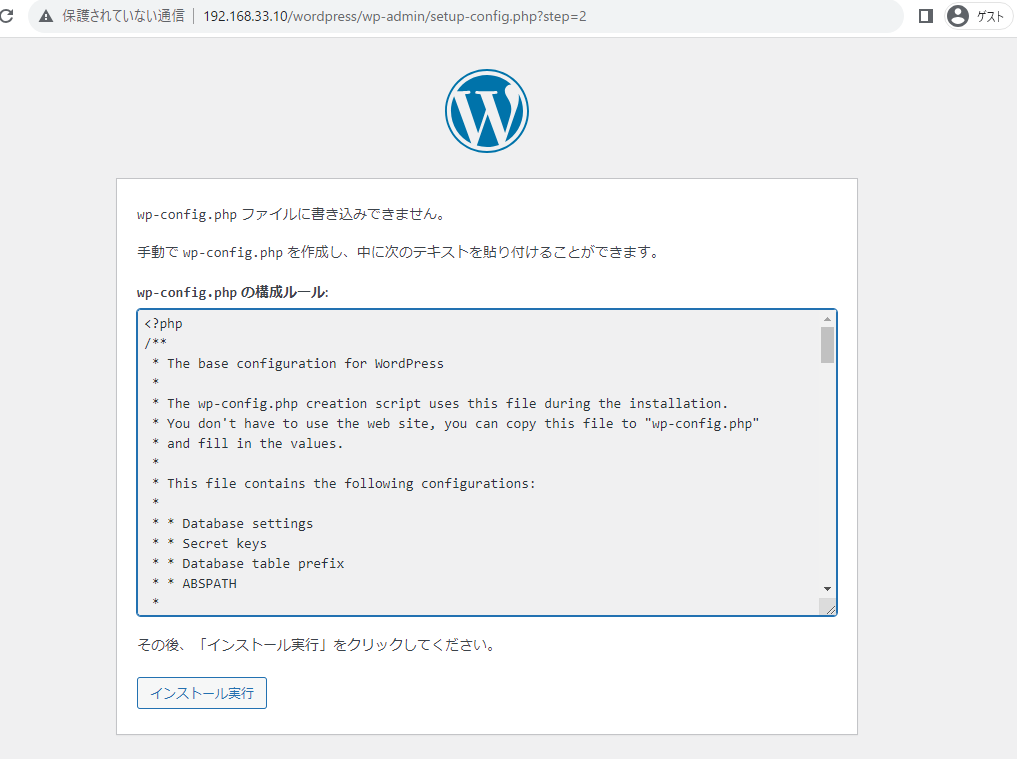
CUI 終わったと思ったけどそんなことなかった。
上記php の内容をぶっこむ。
vagrant@vagrant:~$ sudo vim /var/www/html/wordpress/wp-config.php
そんでインストールを押す。

お、進めた。
なんかよしなに名前を付けよう。
それでインストールを押す。
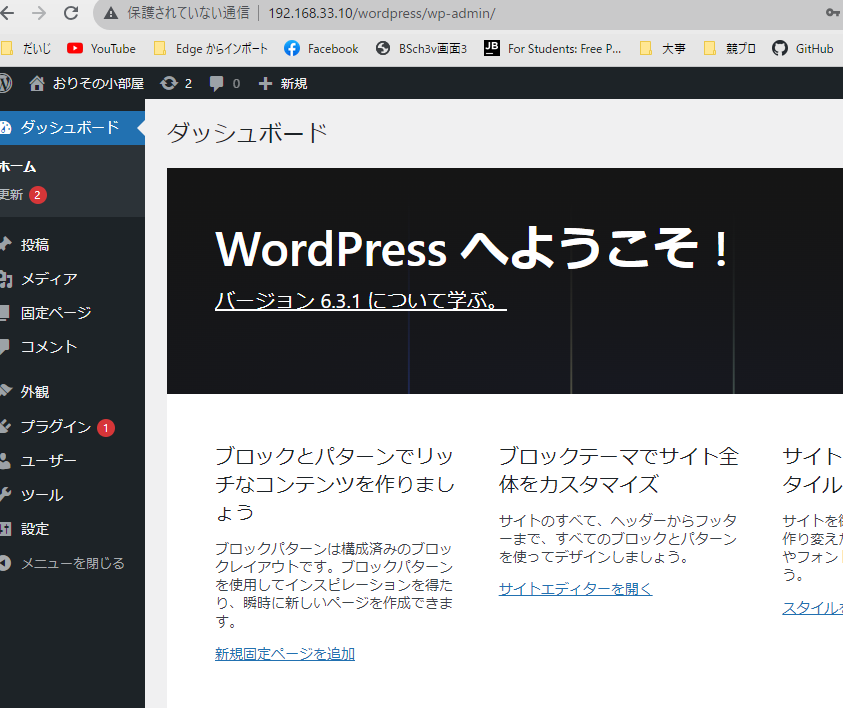
やった!できた!
長い道のりでした。
最後に
今回は下記インストールしました。 - 環境: Ubuntu22.04 - Apache2.4 - PHP8.1 - MySQL8.0 - WordPress6.3.1
3日くらいかかってしまいました。
でもこれを一度にするのは慣れてないと無理ですね。
備忘録も小分けにしたらよかったなと思いました。
誤字脱字・表記揺れは今回は気にしないでいただけると有難いです……
確認は無理だわこれ……
今後の反省、改善点とします。
ここまで読んでくださりありがとうございました。